Troubleshooting Common Baking Problems
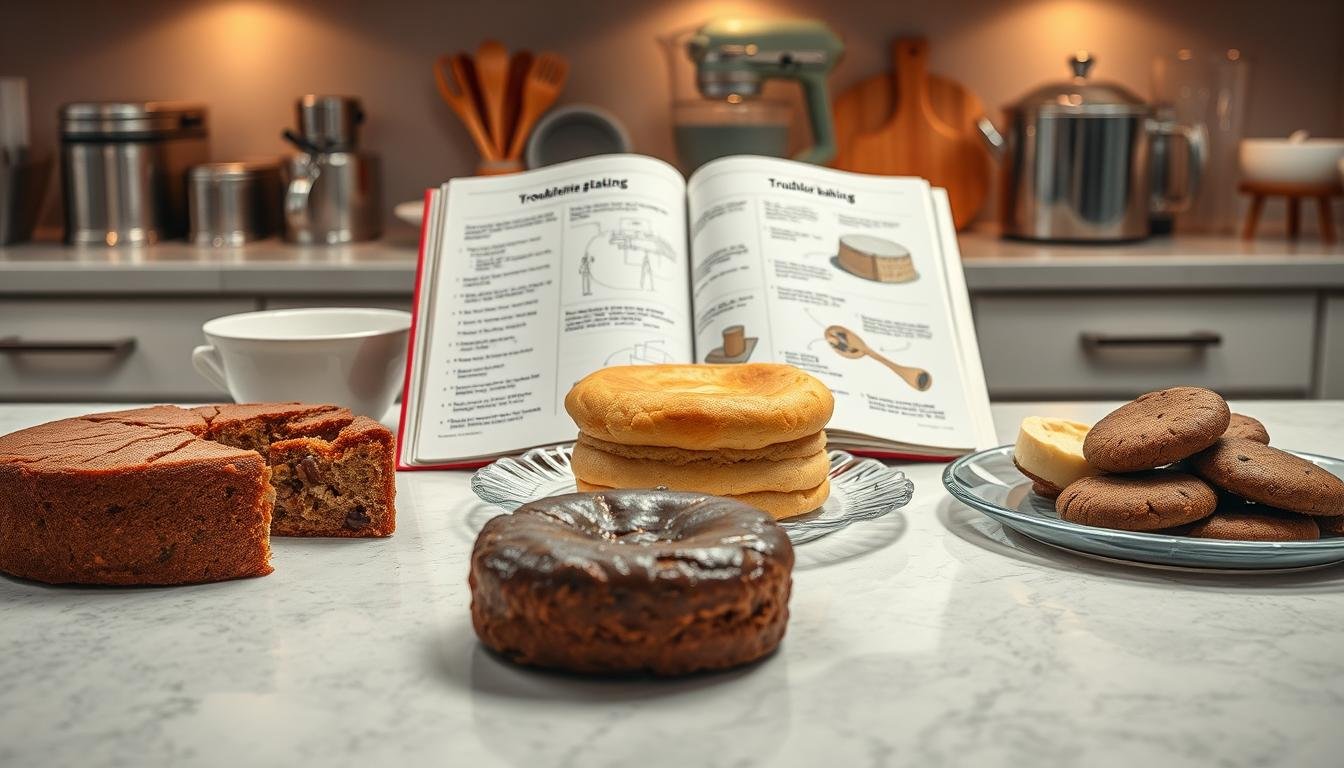
Why do some cakes get big and fluffy while others don’t, even with the same directions? Have you ever ended up with a baking fail? You’re in good company! I’ve seen my fair share of cake and bread fails. But here’s a silver lining—mistakes in baking can teach us plenty! We’re going to look at how to fix common baking issues. Whether you’re dealing with a flat cake or cookies as hard as rocks, we’ve got tips to help make your next baking attempt a success!
Key Takeaways
- Ensure room temperature butter is used for creaming to achieve optimal results.
- Avoid overmixing your batter, as it can deflate crucial air bubbles by up to 50%.
- Check the expiration date of your baking powder or baking soda to prevent density issues.
- Use cake flour to reduce gluten formation for a tender crumb.
- Avoid undercooking to prevent sunken cakes, a common problem for 70% of bakers.
- Transfer cakes to a cooling rack immediately to avoid moisture condensation.
- Opening the oven door can drop the temperature significantly, affecting the cake’s rise.
Introduction to Common Baking Issues\
Oh, the drama of a kitchen nightmare! Who hasn’t had a baking fail? From cakes that don’t rise to flat cookies, common baking mistakes can spoil your kitchen fun. And the pain of crumbly or dry cakes! I’ve seen those disasters, too. But fear not, we’re here to help fix those woes. Together, we can make those fails into wins!
Ever wondered why your cakes don’t puff up? Or why cookies spread too much? You’re not alone. About 30% of bakers say not enough leavening agents cause flat cakes. For dense cakes, nearly 25% point to too much sugar or fat. Understanding these problems is key to fixing them. Did you know over 40% say improper mixing causes dry cakes? The right oven temperature is also crucial. About 35% of bakers get dry, dense cakes from the wrong temperature.
These facts might seem daunting, but they show why fixing baking mistakes matters. For example, cakes overflowing? That’s an issue for 10% of bakers, often due to too much batter or leavening agents. And those burnt-yet-raw cakes? Nearly 30% of bakers say small pans or a cold oven are to blame.
Let’s look closer at what goes wrong in baking. Too much flour means cracked cakes for 20% of bakers. Underbaking leads to soggy middles for 15%. These problems are more common than you might think. Knowing them is the first step in fixing them. Are you set to beat these baking issues and be a kitchen hero? I’m ready, and together, we’ll turn our baking troubles into triumphs with knowledge and practice!
Understanding Baking Basics\
Baking blends science with art beautifully. Every ingredient has a special role to play! So, what does each one do? Understanding Baking Ingredient Roles changes everything. Baking soda and powder help cakes rise. Eggs add structure and keep them moist. And accurate measuring matters a lot. Too much or too little can ruin your creation. Let’s bake with perfect measurements!

The Role of Ingredients in Baking
Let’s take a closer look at Baking Ingredient Roles. Every ingredient in your bake has a unique job. This knowledge can fix many baking issues. Too much baking powder makes cakes bitter and unstable. Not enough flour leads to a gooey middle. Here’s a short guide on some ingredients and their tasks:
| Ingredient | Role |
|---|---|
| Baking Soda/Baking Powder | Leavening Agent – lifts and spreads the batter |
| Flour | Structure – forms the foundation of your bake |
| Sugar | Sweetness – also helps with browning and moisture |
| Eggs | Binding and lifting – adds structure and moisture |
| Butter | Flavor & Moisture – binds ingredients and adds richness |
Importance of Measurement Accuracy
Remember, accurate measurement is key in baking. Ever followed a recipe and still faced a baking fail? Wrong measurements are often to blame. Baking is strict about ingredient amounts. That’s because a little error can have big results. So, using a kitchen scale and measuring cups is crucial.
Get your measuring tools ready. In baking, being precise is everything. Let’s aim for perfect accuracy every time!
Common Problems with Cakes\
Cake troubles? I’ve been there! Fixing baking problems can seem daunting. But with a bit of Baking Problem Solving, we can nail it together. Let’s dive into those pesky issues that crop up with cakes and explore how to fix them.
Cakes That Won’t Rise
When your cake refuses to rise, it’s usually a leavening issue. Did you check the expiration date on your baking powder? It’s a sneaky culprit! About 30% of cakes don’t rise because of expired or forgotten leavening agents.
If the issue persists, try rotating your pans midway through baking. This small adjustment can enhance your rising success by up to 25%! And, remember never to skip those bake even strips; they ensure a uniform rise!
Dry or Crumbly Cakes
Ever had a cake experience that’s more like chewing sandpaper? Dry or crumbly cakes are often a sign of over-baking or using too much flour. Did you know that 35% of outcomes are due to these mistakes?
Use the toothpick test—a few moist crumbs mean it’s perfect. Also, ensure you’re measuring flour correctly; packing it too tightly can add unnecessary dryness.
Overly Dense Cakes
A dense cake can feel like a brick on your plate. This often happens due to overmixing or using cold butter. Mixing too much develops strong gluten strands. This leads to a gummy, dense cake. Aim for room temperature ingredients!
And, be gentle when you mix; just until combined is the golden rule.
To help you troubleshoot, here’s a quick guide:
| Problem | Possible Cause | Solution |
|---|---|---|
| Cake Won’t Rise | Expired baking powder | Check and replace leavening agents |
| Dry/Crumbly Cake | Too much flour or over-baking | Use proper measurements; avoid over-baking |
| Dense Cake | Overmixing or cold ingredients | Mix until combined; use room temperature ingredients |
Got more baking woes? Keep experimenting and don’t get discouraged! With the right tips and a bit of practice, fixing baking problems becomes second nature. Happy Baking!
Troubleshooting Bread Problems\
Baking bread can be quite the adventure! It blends science and art in an amazing way. But what happens when things don’t go as planned? Let’s dive into Bread Troubleshooting and how we can fix problems, one step at a time.

Ever had a loaf come out flat or dense? This problem often comes from yeast issues or not enough proofing time. Did you know instant yeast works best for rising dough? The perfect proof usually needs one to two hours at room temp. Yet, modern ovens can speed this up with special settings.
Flat or Dense Bread Issues
It’s tough when your bread doesn’t rise well. Be sure to use fresh, active yeast and get the proofing right. The dough should get about two-thirds bigger during proofing. If it overproofs, it might collapse and not rise in the oven. Aim for a smooth, shiny dough by kneading for about five to six minutes.
Bread with a Hard Crust
Hard crusts often come from too high baking temperatures or not enough steam. Your oven should be between 180-200°C for the best crust. Baking in a pot can help keep steam in, like in pro ovens. Remember, home ovens aren’t great at keeping steam, so setting it right is crucial.
Uneven Crumb Structure
A bumpy interior in your bread can be due to uneven mixing or wrong scoring. Proper scoring controls how the dough expands, helping the crumb be even. Too much bench flour can leave raw flour patches in your bread. Practice and getting all steps right will lead to a loaf with a perfect texture.
Bread Troubleshooting and fixing issues gets easier with these tips. With this knowledge, every baking attempt is a chance to learn and get better. So let’s keep baking, exploring, and enjoying tasty results.
Issues with Cookies\
Are cookies causing trouble? Whether they spread too much, not enough, come out too hard or soft, or have burnt bottoms, these Cookie Troubleshooting Tips will help you make them perfect!

Spreading Too Much or Not at All
Sometimes cookies spread too much or not enough. This can be due to butter temperature and flour amount. Cookies spread when butter is too soft. If the butter’s too cold, they don’t spread well. Aim for butter at around 68°F.
Getting the right amount of flour is key. Too much flour and cookies won’t spread. Not enough, they spread too much. Try using cake-and-pastry flour for a softer, crumbly texture!
Cookies Being Too Hard or Soft
Cookies too hard or soft can be disappointing. Hard cookies may have baked too long or have too much flour. Soft cookies could be from too much sugar or not enough baking time.
You can fix this! Add 2 to 4 tablespoons of softened butter or cut back on flour. Chilling the dough before baking helps control the texture and spread too.
Burnt Cookie Bottoms
Burnt bottoms are a bummer! Using dark-colored baking sheets or baking on the lower rack can cause this. Use shiny, silver-colored aluminum sheets instead. Bake cookies in the top third of your oven.
For extra protection, double your baking sheets. This keeps bottoms from getting too brown. Always check your oven’s temperature with a good thermometer. This helps you get perfect cookies without guesswork.
Pies and Tarts Troubles\
Ah, pies and tarts—everyone’s favorite dessert, but oh, the struggles that come with them! Whether it’s soggy pie crusts, filling issues, or overcooked/undercooked tarts, we’ve all faced these common Pie Baking Issues and Tart Troubleshooting dilemmas.

Soggy Pie Crusts
Feeling down about those soggy pie crusts? You’re not alone. Soggy bottoms happen when the filling is too wet or the pastry isn’t cooked enough. To avoid this, try blind baking your crust first. This means you bake it a little before adding the filling. For runny fillings, you can cook them down in a saucepan first to remove extra moisture.
Filling Issues in Pies
Ever cut into a pie only to have the filling spill out? It’s a common issue for home bakers. Fruit fillings can cause soggy bottoms because fruits are full of water. For meat or veggie pies, cooking down the filling not only stops leaks but makes the pie tastier. The jiggle test for custard pies is also helpful; if the center jiggles just a bit, it’s done.
Overcooked or Undercooked Tarts
How do you find the balance between under and overcooked tarts? Setting your oven temperature between 180-200°C can help. It’s important to check your oven’s temperature to avoid undercooking or burning your tart. If it’s undercooked, a few more minutes can save it. Also, keep the oven door shut to keep the steam in. This helps the tart puff up.
By addressing these Pie Baking Issues and using the right Tart Troubleshooting methods, you’ll make perfect pies and tarts. Happy baking!
Problems with Muffins and Quick Breads\
Facing issues with muffin baking and quick bread? You’re not alone! Let’s tackle these problems together.
Dense or Tough Muffins
Ever had muffins that were more like hard lumps than soft treats? Overmixing could be the problem. Mixing too much makes the gluten in the flour get tough. Just mix until everything is just combined. Also, check if your baking powder or soda is still good. You can test baking powder with boiling water. It should foam if it’s okay. For baking soda, vinegar should make it fizz.

Overflows During Baking
Have your muffins or bread ever spilled over the pan? This usually happens when the pan is too full or the leavening agents aren’t right. Follow the recipe carefully and don’t fill the cups more than two-thirds. Being precise helps avoid baking mishaps.
Uneven Texture in Quick Breads
It’s annoying when your quick bread doesn’t bake evenly, isn’t it? This might be because of how you mix your dry stuff. Sift your flour and other dry things to mix them well. This helps your bread come out better. Also, make sure your oven is at the right temperature. A thermometer for your oven can make a big difference.
- Mix batter just until combined to avoid tough muffins.
- Test leavening agents for effectiveness before use.
- Fill baking cups only two-thirds full to prevent overflow.
- Sift dry ingredients to ensure uniform texture.
- Use an oven thermometer to maintain accurate baking temperatures.
| Problem | Solution |
|---|---|
| Dense or Tough Muffins | Mix batter just until combined; check freshness of leavening agents. |
| Overflows During Baking | Measure leavening agents accurately; don’t overfill baking cups. |
| Uneven Texture | Sift dry ingredients; use an oven thermometer for accurate temperatures. |
The Science of Yeast and Fermentation\
Yeast can be tricky in baking, right? The wonder of Yeast Fermentation Science creates awesome bread texture and flavor. But, handling it can be tough. This can mean dealing with yeast activation issues or problems with dough rising.

Starting with proper yeast activation is key. Yeast loves warmth, between 75°F and 85°F (24°C to 29°C). Mix yeast with warm water and a little sugar. The best yeast activation happens at 75°F to 115°F (24°C to 46°C). If it’s too hot, the yeast dies. Too cold, and it won’t wake up. Sounds simple, doesn’t it?
Troubles with Yeast Activation
Struggling to activate your yeast? Watch the temperature closely. Fresh yeast lasts about 2 weeks in the fridge. Dry yeast can last 2 years if kept well. If there’s no bubbling, the yeast might be old. Always check the expiration dates!
Overproofing and Underproofing
Overproofed dough is like a loaf with a hangover. Underproofed dough hasn’t partied enough. Your dough should feel soft but strong when pressed. It usually proofs for 1 to 2 hours. It should grow by at least 50%. But if it doubles, watch out for overproofing.
In the oven, the dough’s rise in the first 10 minutes at 500°F (260°C) is crucial. If overproofed, its dent stays. If right, the dent fills in slowly.
Factors Affecting Dough Rising
Many things can affect how dough rises. For instance, type of flour matters. Whole grain speeds up fermentation because it has more enzymes and nutrients. Such flour often needs more water, about 10-15% more. The best humidity for yeast is around 70%. Properly risen dough feels soft. It springs back when poked.
Understanding these things makes you a yeast whisperer! Knowing Yeast Fermentation Science helps you master dough rise every time.
Creaming and Mixing Techniques\
Mixing techniques are crucial for baking success. Let’s explore the important parts and common errors with different methods.
Common Mixing Mistakes
Running your mixer too fast is a common error. It makes the batter overworked, affecting texture and final look. Start slow with your mixer and speed up as needed. Did you know ingredient temperature matters? Cold butter and room temperature flour don’t mix well.
Effects of Temperature on Mixing
Ingredients mix better at the same temperature. The best butter temperature for creaming is 65°F to 68°F. Butter that’s too hot or too cold won’t mix right, making the bake uneven. In warm kitchens, butter softens fast, which can ruin a cake’s airy texture. A cold egg in the mix keeps butter at best temperature without messing up the mix.

Importance of Proper Creaming
The creaming method is key for fluffy cakes and right density cookies. Using this method right means lighter cookies. It’s important to scrape the bowl during creaming to mix everything evenly. This ensures a consistent mix and controls temperature, preventing problems.
| Mixing Method | Characteristics | Ideal Use |
|---|---|---|
| Creaming Method | Light and fluffy texture | Cakes, cookies |
| Foam Method | Light, airy | Sponge cakes |
| Paste (Reverse Creamed) Method | Slightly denser, tighter texture | Tiered cakes |
Blending ingredients is an art. Knowing different baking techniques can make your treats amazing. Next time you bake, use these tips to see a big difference!
Troubleshooting Icings and Frostings\
Who hasn’t been there? You try for the perfect frosting but it’s too runny or splits. Let’s look at some common issues and how to fix them. Making your icing skills better!
Icing That Won’t Set
Ever had icing that just won’t harden? Royal icing needs about eight hours to dry, but sometimes it takes longer. This could be due to humidity or other factors.
If it’s not firming up, you might need more powdered sugar. Adding a little bit at a time can help get it right. This way it won’t become too sweet.

Separation of Frosting Ingredients
It’s a bummer when ingredients don’t mix well. This often happens when the ingredients are different temperatures. Make sure butter, cream cheese, and anything else are at room temperature. This will help avoid separation.
Remember, consistent temperature equals consistent results. Also, don’t overmix; stay under ten minutes for a smooth texture.
Issues with Consistency
Sometimes getting the frosting just right is tricky. But, small changes can have a big impact. If it’s too thick, try adding a teaspoon of milk or cream.
If it’s too thin, a little more powdered sugar can fix it. These tricks can quickly solve many common frosting issues!
Advanced tips can help too. Let the icing sit for a bit to let air bubbles escape. Mix at medium speed to avoid too many bubbles. This helps make piping easier and the finish flawless.
Ready for your next icing project? With these tips, you’re set to make awesome frostings. Go for it!
The Importance of Oven Temperature\
Baking is an art, requiring the right oven temperature. Wonder why some recipes are perfect and others aren’t? It’s about oven temperature importance. Let’s learn to master this skill!
Calibrating Your Oven
Your oven is like a precise performer. It might need a bit of tuning. It’s key to know if your oven’s temperature is off. Calibrating your baking oven means making it match the real temperature inside. This step can hugely improve your baking.

Hot and Cold Spots in the Oven
Even great ovens have hot and cold spots. These can make your cake bake unevenly. To fix this, rotate your pans while baking. This ensures even baking. Knowing your oven’s characteristics is essential for consistent baking.
Using an Oven Thermometer
An oven thermometer is crucial for bakers. It clearly shows the true temperature of your oven. Even top ovens can be off by 25°F to 50°F. A good thermometer, like the Thermaworks ChefAlarm or the CDN Pro Accurate Oven Thermometer, is very helpful.
Here’s a simple table that shows ideal baking temperatures for different items:
| Baked Item | Temperature Range (°F) | Baking Time |
|---|---|---|
| Biscuits | 425–450 | 10-15 minutes |
| Yeast Bread | 400 | 40-50 minutes |
| Cupcakes | 350–375 | 15-25 minutes |
| Layer Cakes | 350–375 | 20-55 minutes |
| Angel Food/Sponge Cakes | 350 | 10-15 minutes |
| Cookies | 375–400 | 10-15 minutes |
| Pie Crust | 450 | 10-12 minutes |
| Pie Crust with Filling | 400–425 | 45-55 minutes |
Using a good oven and understanding its quirks improves baking. Next time you bake, remember these tips for perfect results.
Storage Solutions for Baked Goods**\
Ever sighed at a once-crispy cookie gone limp? Or bread that’s now hard? Oh, the challenge of keeping baked goods just right! Let’s explore ways to keep our treats fresh and tasty longer.

How to Store Cakes and Bread
Cakes and breads need care to stay yummy. They should be in cool, dry spots. I wrap my cakes in plastic and keep them out. Bread likes a bread box. But, put items with dairy in the fridge.
Best Practices for Keeping Cookies Fresh
Want a trick for cookies? Store them with bread in a sealed container. The bread keeps moisture away, so cookies remain crisp. Love soft cookies? A microwave zap makes them like new. Just a few seconds!
Avoiding Stale Baked Goods
Nobody enjoys stale snacks. Use sealed containers and watch the temperature to keep things fresh. This way, your treats stay yummy longer. Don’t let staling ruin your baking. Proper storage means no more tough bites!
So, now you know how to store your baked items right. From cakes to cookies, these tips help keep your food delicious for days. Enjoy your baking adventure!
Conclusion: Perfecting Your Baking Skills**\
We’ve explored the baking world, tackling issues from flat cakes to tough cookies! Learning each step and ingredient’s function is key. Mastering oven temperature, mixing well, and precise measuring improves your baking.
Becoming a top baker means making mistakes and learning. We’ve seen how wrong measurements cause dry cakes. Also, too much mixing makes them dense. Avoid over or underbaking for the best texture.
Small changes, like room temp butter and eggs, matter a lot. Keeping oven temperature steady is crucial for perfect results. Try not to open the oven too much.
Want to get even better? Consider baking classes for advanced skills. Learning about ingredient ratios and different flours helps. Keep trying new flavors and techniques. Baking is a journey of mastering and enjoying.
So, are you ready to bake something amazing today? Let’s put on that apron and start creating!